Neuron Wallet
Neuron Wallet is a CKB wallet produced by Nervos Foundation. The wallet holds keys and is capable of creating and broadcasting transactions.
Neuron Wallet is bundled with a CKB Mainnet node and configured to connect to the CKB Mainnet. The bundled Mainnet node runs automatically when a Neuron wallet is set up and launched.
Install Neuron Wallet
Download and install the latest version of Neuron Wallet from the Neuron Wallet releases page on Github.
Note: For Windows versions before Windows 10, the latest Microsoft Visual C++ Redistributable for Visual Studio 2015, 2017 and 2019 must be installed before installing Neuron Wallet.
Set Up a Neuron Wallet
Here are three options to set up a Neuron wallet.
Create a new Neuron wallet.
Import a wallet seed of a backed up wallet.
Import a keystore file of a backed up wallet.
Create a New Neuron Wallet
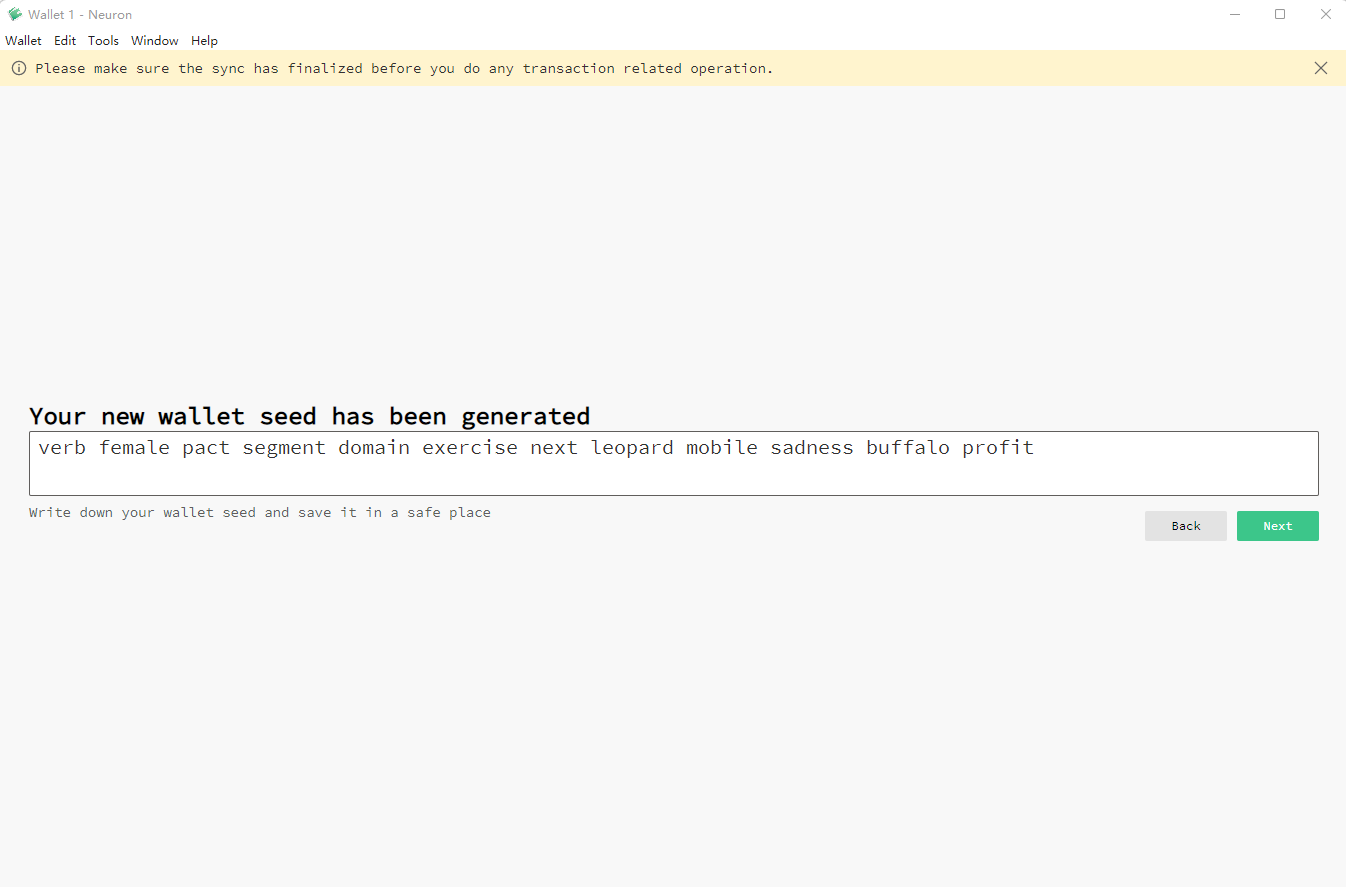
To create a new wallet, select Create a New Wallet.
A new wallet seed consisting of 12 mnemonic words is generated.
Note: Screenshots and copies of the mnemonic words may be read by third parties. Hand-copying is recommended for keeping the mnemonic words.
Import a Wallet Seed of a Backed Up Wallet
To import a mnemonic seed:
- Select Import Wallet Seed.
- Enter the password and wait for the sync to complete.
Import a Keystore File of a Backed Up Wallet
To import a keystore file:
- Select Import from Keystore.
- Enter the password, then wait for the sync to complete.
Await the Sync to Complete
The Block Number can be cross-checked with the Latest Block on the CKB Explorer page to ensure that the sync is completed.
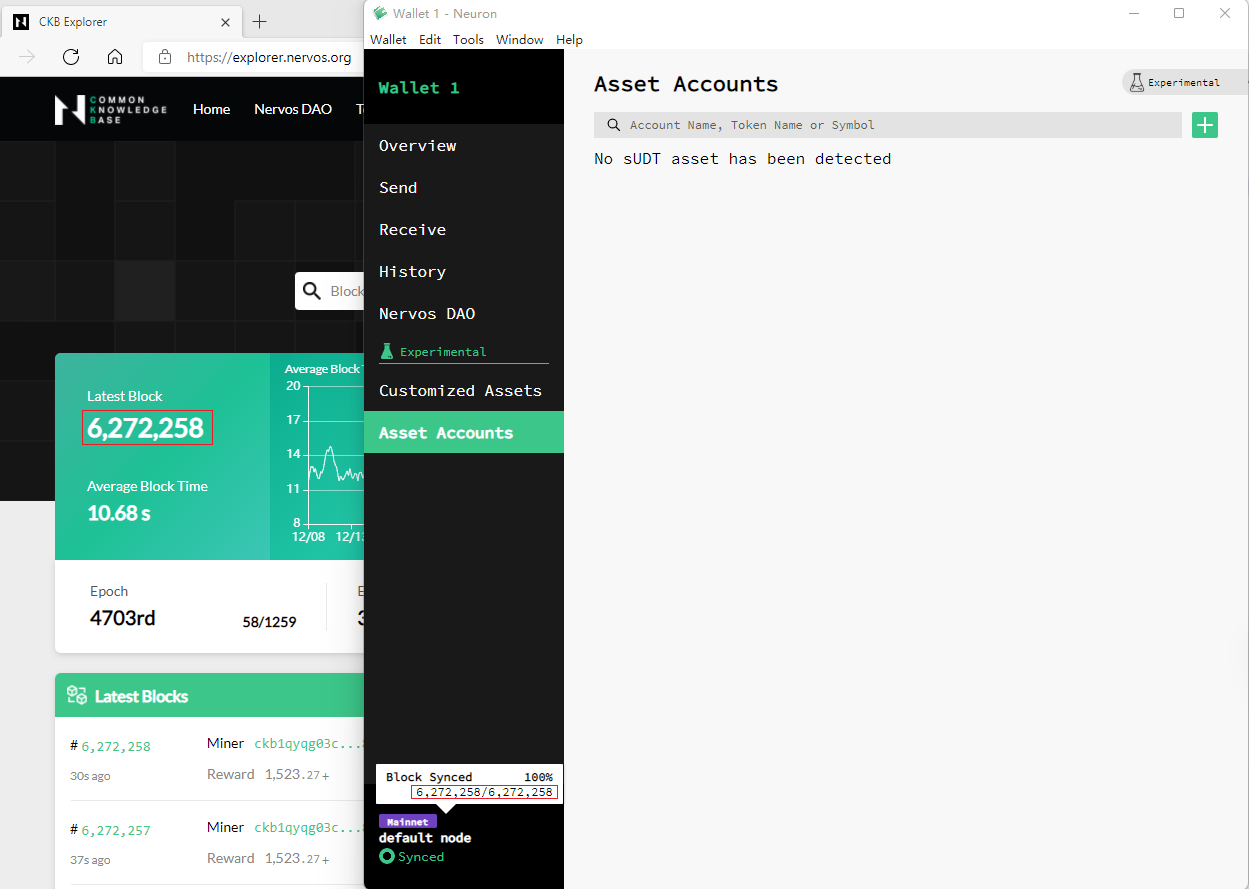
After the Neuron wallet is synced, full access to the tokens of the wallet is available. Sending, receiving CKBs, and depositing CKBs to Nervos DAO is possible.
Transfer CKB from Neuron Wallet to Other Wallets or Exchanges
Note: The wallet must have a minimum of 61 CKBs for a transfer operation.
To transfer CKB:
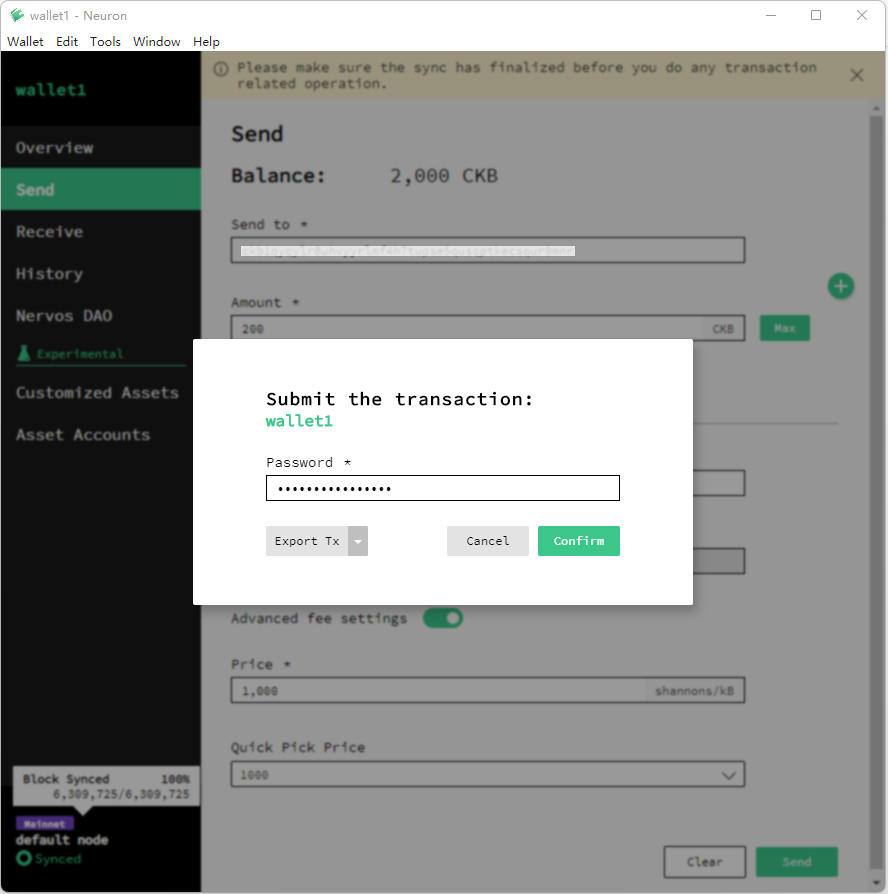
Fill in the Send to field with the address of the third party wallet or exchange on the Send page.
Use the default fee settings or change the fee settings in Advanced fee settings.
Click the Send button.
Input the password and click Confirm to complete the transfer.
Deposit CKB into Nervos DAO
Note: The wallet must have a minimum of 102 CKBs for a Nervos DAO deposit operation.
The economic model of Nervos CKB is designed to allow token holders to lock their tokens in Nervos DAO to mitigate the inflationary effect of the secondary issuance. In this case, the inflationary effect of the secondary issuance is expected to be nominal and equivalent to holding tokens with a hard cap.
To deposit CKB into Nervos DAO:
Select the Nervos DAO tab, then click Deposit.
Input the amount of CKB tokens for the deposit and then click Proceed.
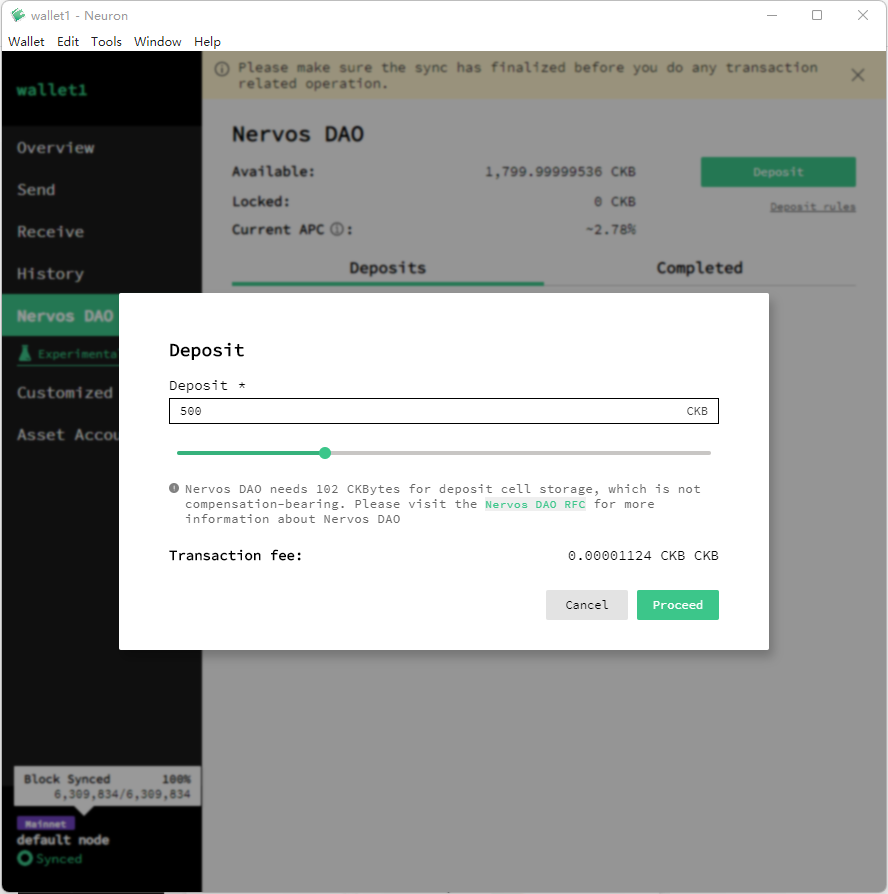
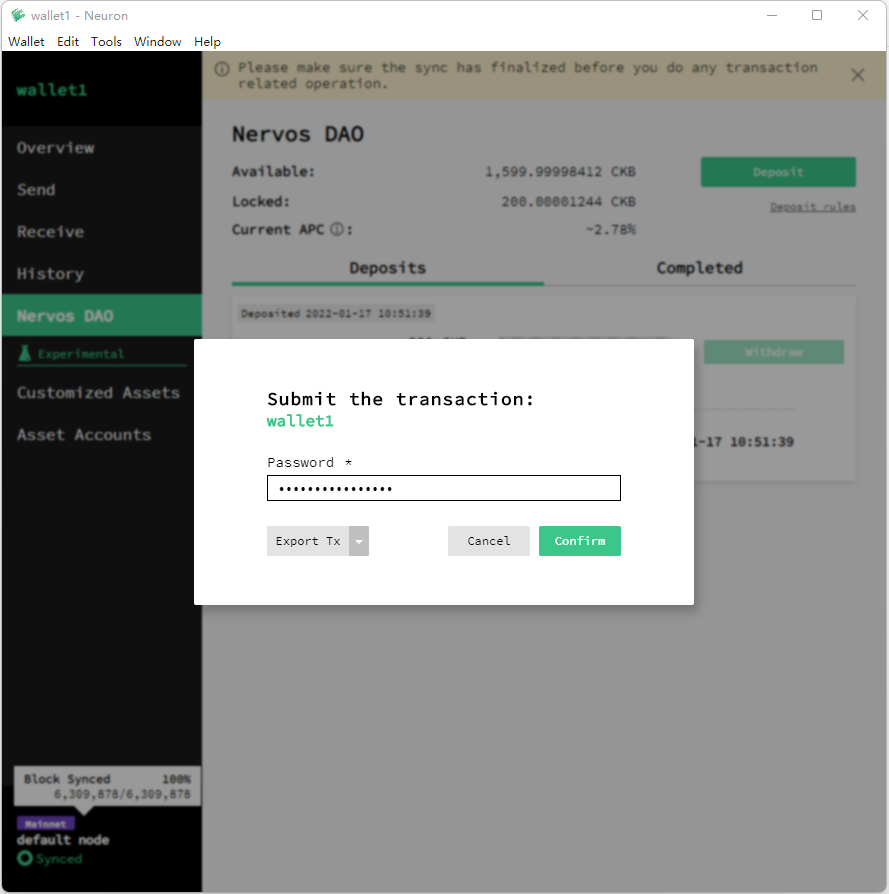
Input the password and click Confirm to submit the deposit transaction.
Withdraw CKB from Nervos DAO
Note: The wallet must have a minimum of 61 CKBs for a Nervos DAO withdrawal operation.
To withdraw CKB from Nervos DAO:
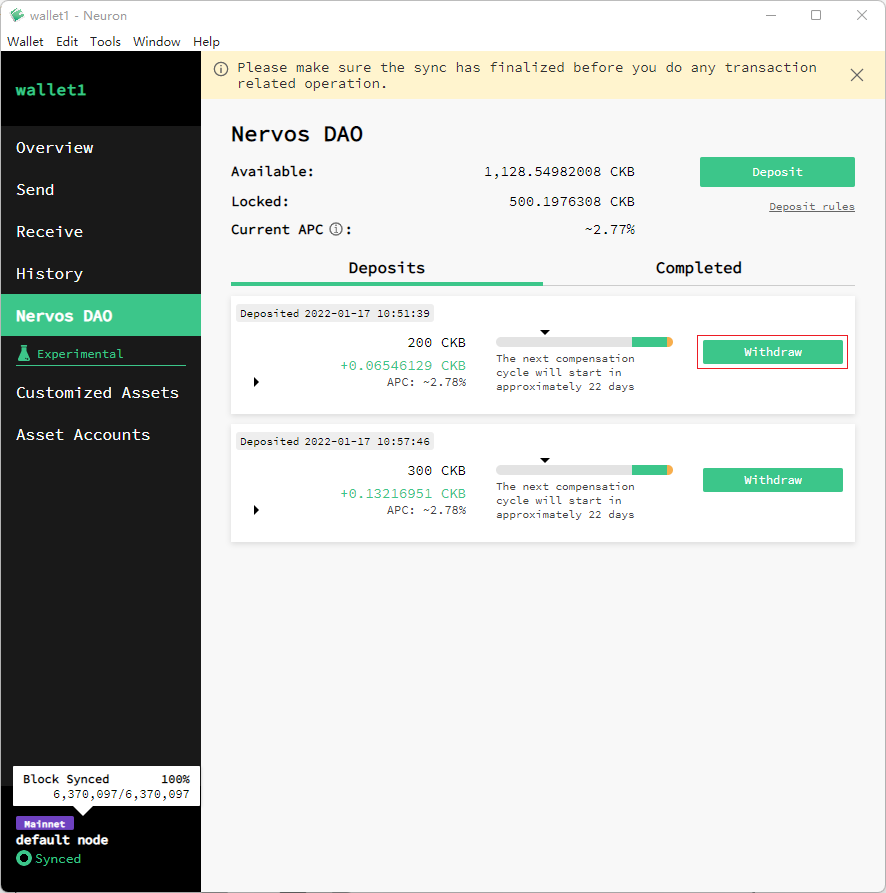
Choose the deposit that you want to withdraw from the deposits list and click Withdraw.
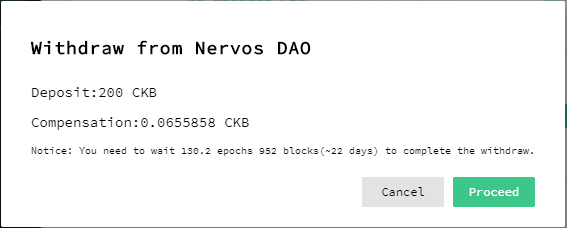
Click Proceed on the pop-up window to complete the withdrawal operation.
Claim Vested or Locked Tokens
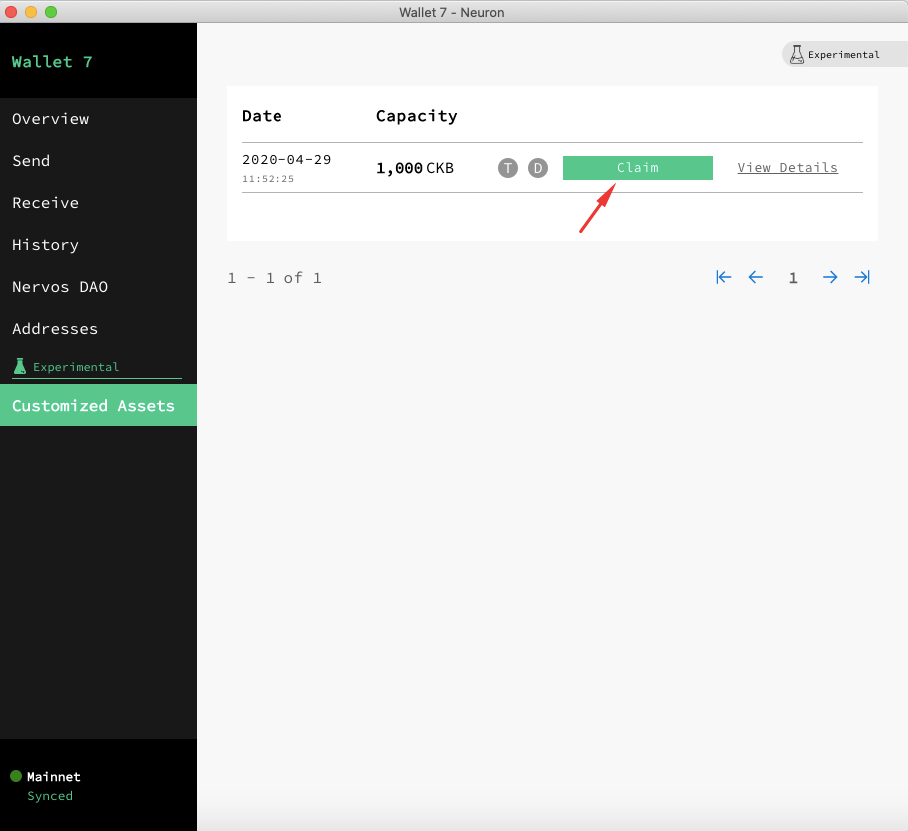
Vested or locked tokens can be claimed by using the latest version of Neuron Wallet. When a Neuron wallet is fully synced, the vested or locked assets are visible on the Custom Assets page.
After the customized assets are claimed, they can be transferred or deposited to Nervos DAO.
To claim vested or locked tokens:
View details of Customized Assets.
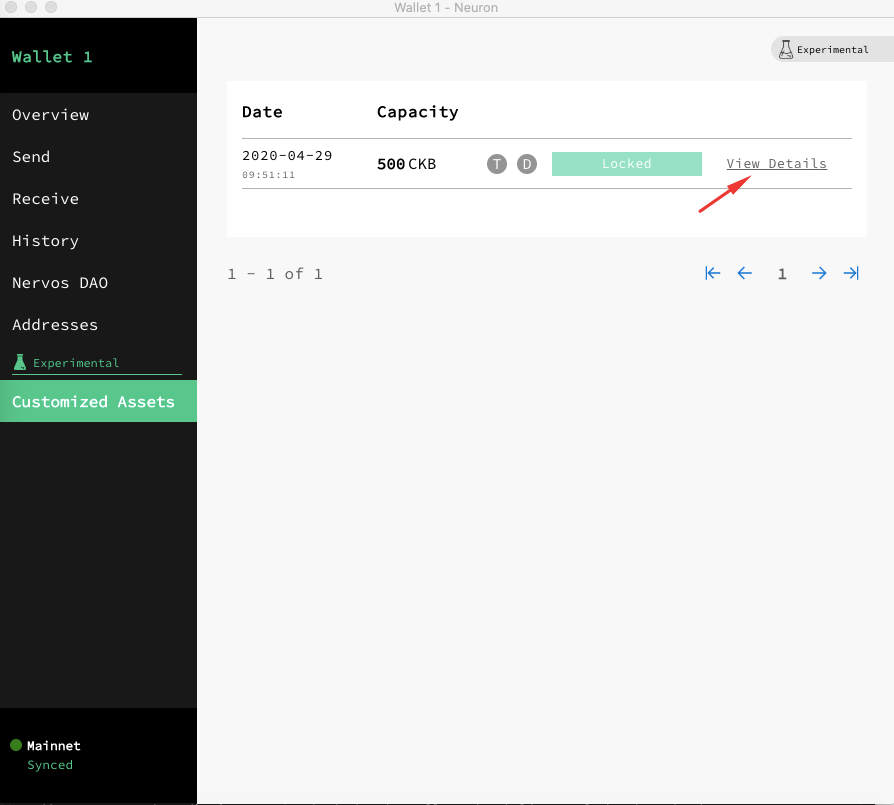
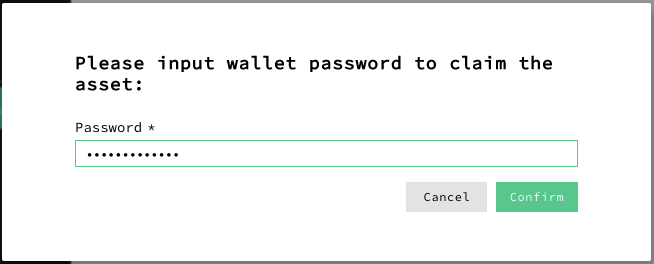
Click Claim when the lock time is expired, and enter the password for the wallet.
Manage Asset Account
Asset Account is used for managing the accounts including anyone-can-pay (RFC: Anyone-Can-Pay Lock) cells and sUDTs (RFC: Simple UDT). It's recommended to use ckb-udt-cli to issue or transfer UDTs. For more information, see the GitHub repository of ckb-udt-cli.
Note: The feature is experimental and only can be used on Testnet Aggron now.
Manage SUDT Accounts
Preparation
Run a CKB Testnet node. For more information, see Run a CKB Testnet Node.
Create a new account and export the privkey by using ckb-cli.
ckb-cli account newClick here to view response
Your new account is locked with a password. Please give a password. Do not forget this password.
Password:
Repeat password:
address:
  mainnet: ckb1qyqwuea9tpxr2equ75rskyn30r3wjans7fnq477mmm
  testnet: ckt1qyqwuea9tpxr2equ75rskyn30r3wjans7fnqgmqyh8
lock_arg: 0xee67a5584c35641cf5070b127178e2e97670f266
lock_hash: 0x8b2595bb1c4720951a5363fbf0adb0ab1e2ff5acd7391f123837242712fc8490
ckb-cli account export --extended-privkey-path wallet --lock-arg `Your lock_arg`Click here to view response
./ckb-cli account export --extended-privkey-path wallet --lock-arg 0xee67a5584c35641cf5070b127178e2e97670f266
Password:
Success exported account as extended privkey to: "wallet", please use this file carefully
cat walletThe first line of the result is the exported private key.
Click here to view response
0a348a7cd1449ece26f1cede3916266793ce18beb280b75dda690057ebfcda3c  // It is the privkey
c152037977043a11e7e6ef220ba050da12da16455a0ef303907865a15fa9c484
Issue UDTs by using ckb-udt-cli.
To issue UDTs:
Clone and build ckb-udt-cli.
git clone https://github.com/ququzone/ckb-udt-cli.gitcd ckb-udt-cliexport GOPROXY=https://goproxy.iogo mod downloadgo build .Claim CKBs on Testnet by using Nervos Aggron Faucet.
Issue UDTs and back up the
uuid.ckb-udt-cli issue -c config.yaml -k YOUR_PRIVATE_KEY -a AMOUNT // AMOUNT means the number of issued tokensClick here to view response
./ckb-udt-cli issue -c config.yaml -k 0a348a7cd1449ece26f1cede3916266793ce18beb280b75dda690057ebfcda3c -a 1000000
Issued sUDT transaction hash: 0x6b4458143b25e8aa37d36c1035f15e63e5051144685a4da20cf92fd7af59e56e, uuid: 0x8b2595bb1c4720951a5363fbf0adb0ab1e2ff5acd7391f123837242712fc8490
Add an SUDT Account to Asset Accounts
To add the SUDT account into Asset Accounts:
Open the Asset Account page in Neuron Wallet, and click the + button to create an asset account.
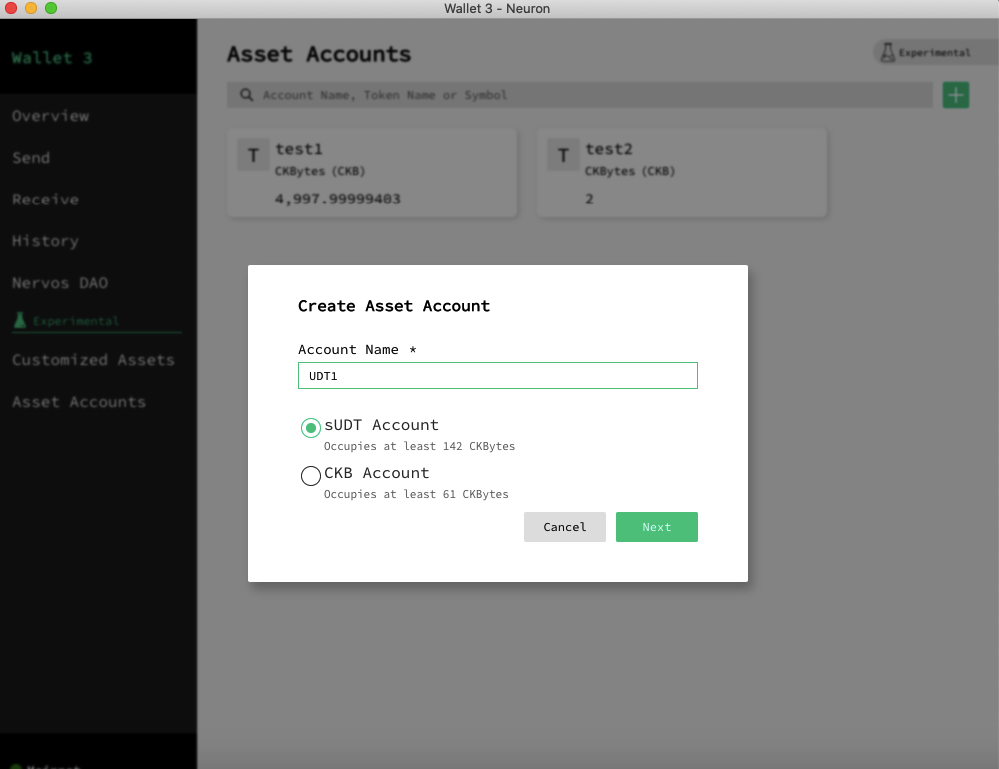
Fill the
uuidin the Token ID field.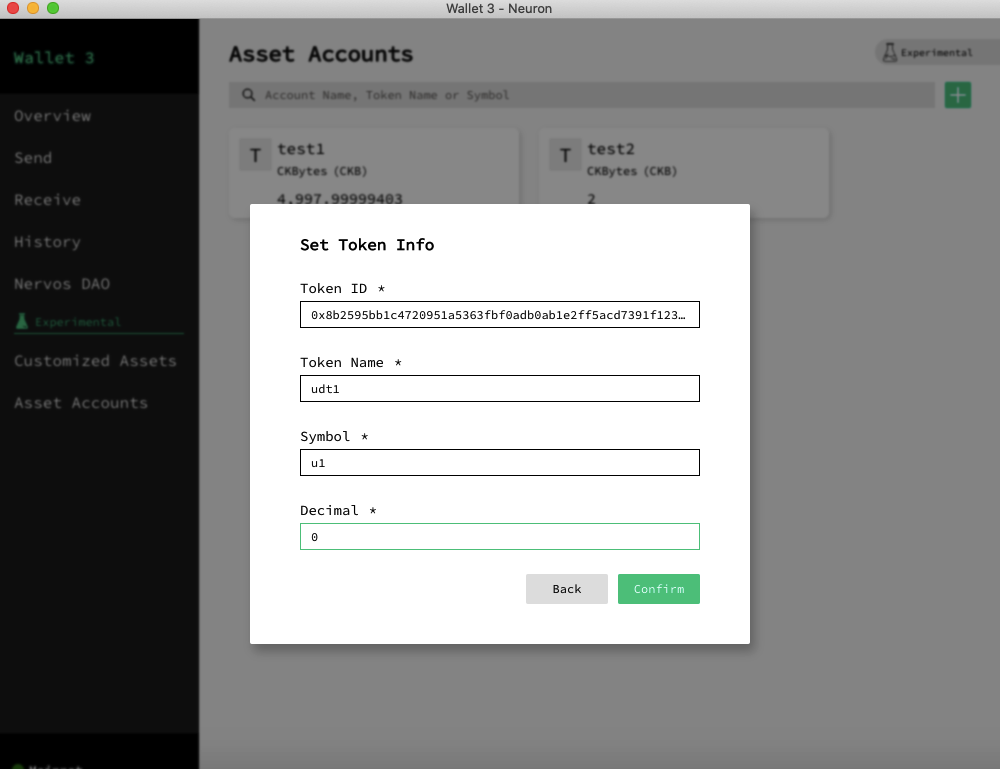
Fill in the other required fields and click Confirm.
Await until the transaction is successful.
Manage CKB Accounts
CKB accounts can be used for anyone-can-pay cells and support any amount of payment.
Create two CKB accounts,
Anyone-can-pay1andAnyone-can-pay2. The following figures show the steps of creatingAnyone-can-pay1. The steps of creatingAnyone-can-pay2are the same as creatingAnyone-can-pay1.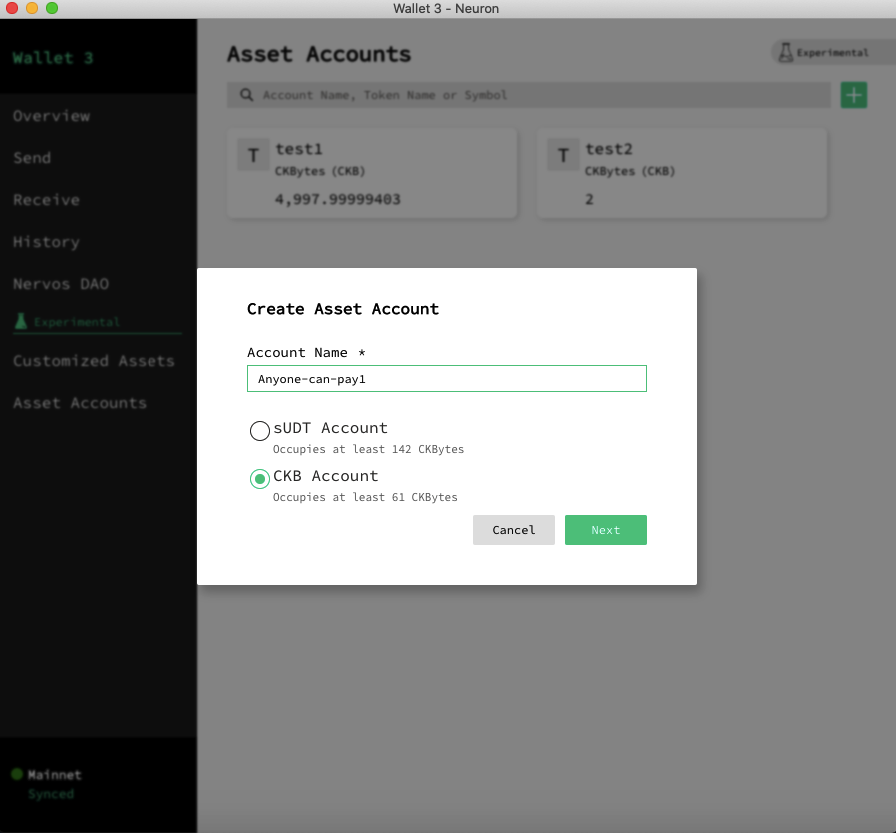
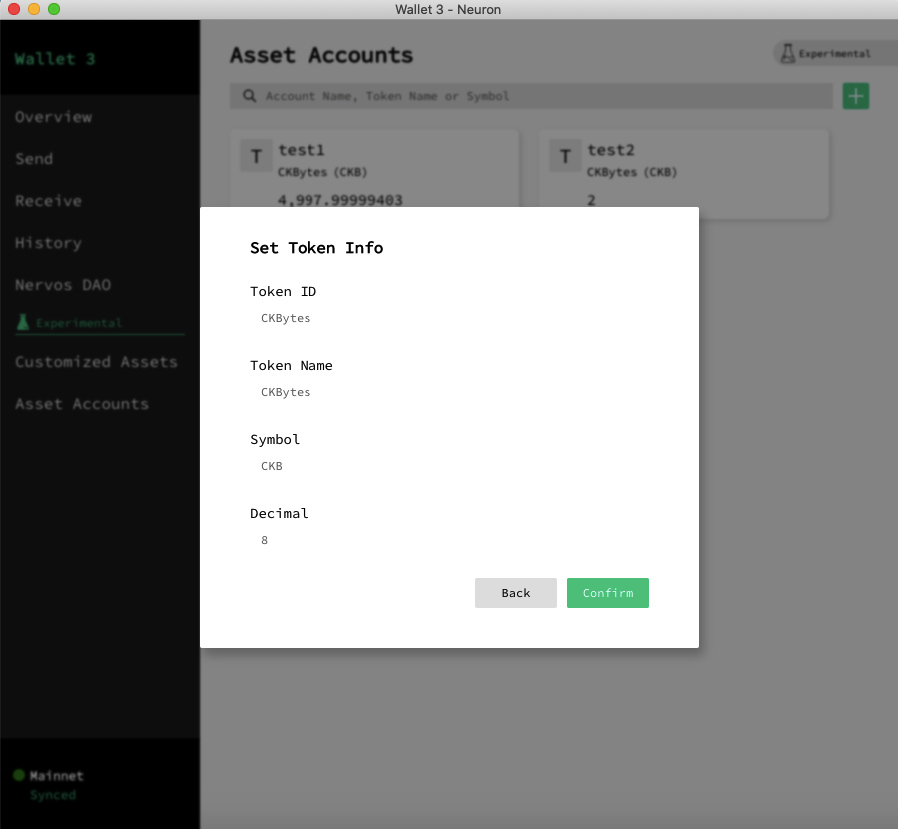
Fill the address of
Anyone-can-pay1in Nervos Testnet Faucet to claim CKBs on Testnet forAnyone-can-pay1.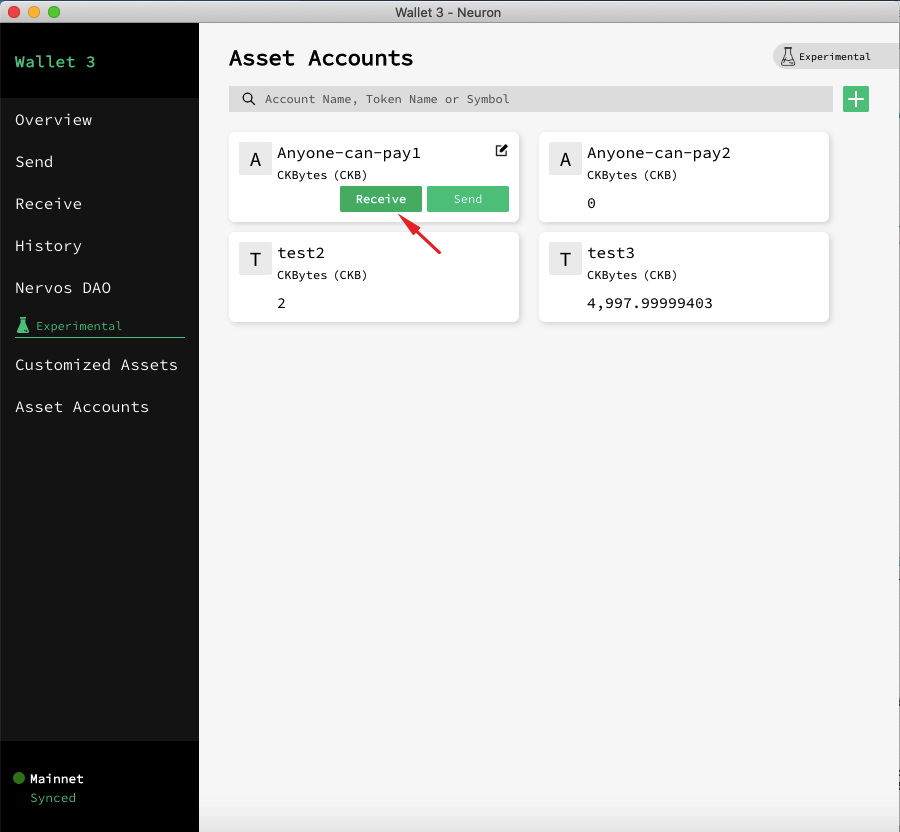
Transfer 1 CKB from
Anyone-can-pay1toAnyone-can-pay2.Click Send on the
Anyone-can-pay1card.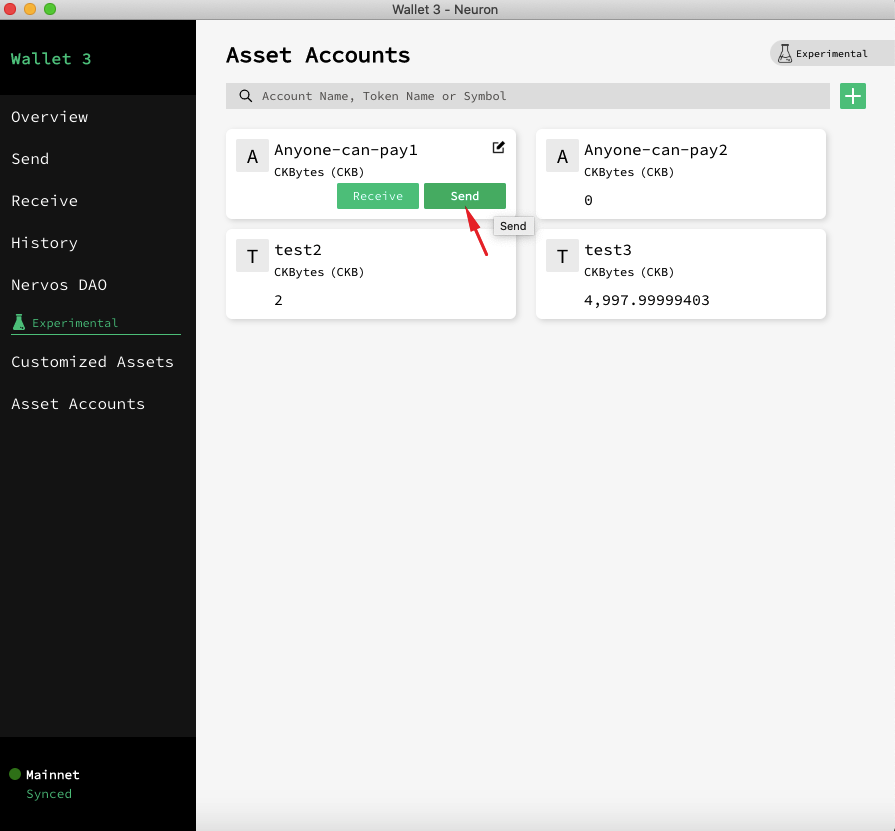
Fill the address of
Anyone-can-pay2and other required input on theSendpage.Click
Submit.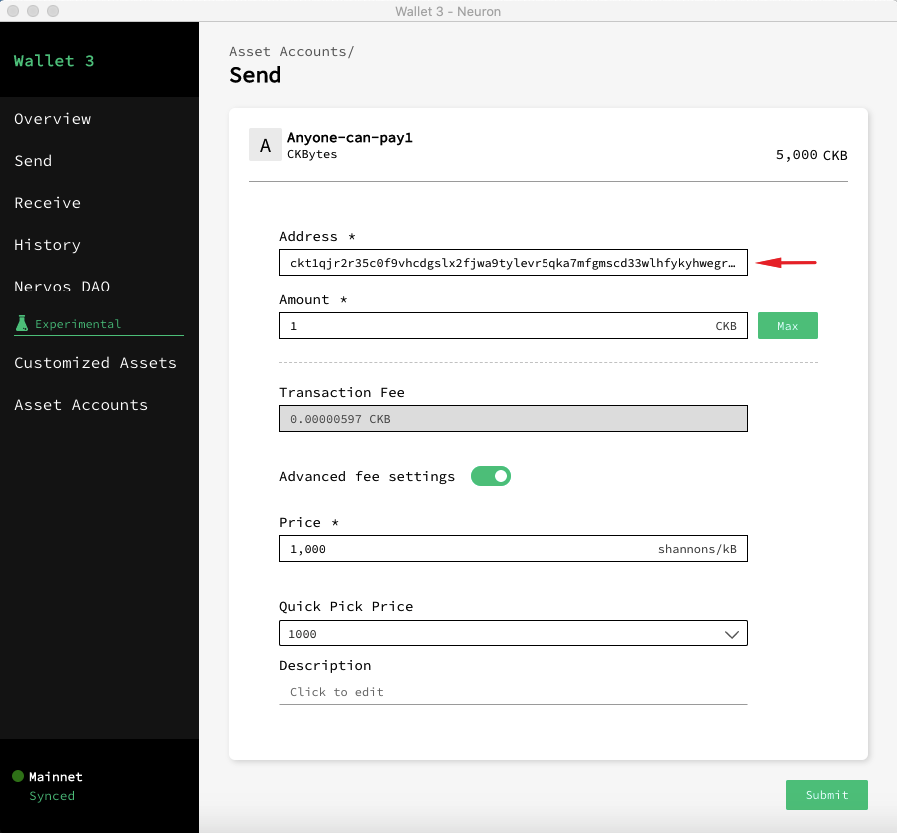
Check the balance on the
Anyone-can-pay2card.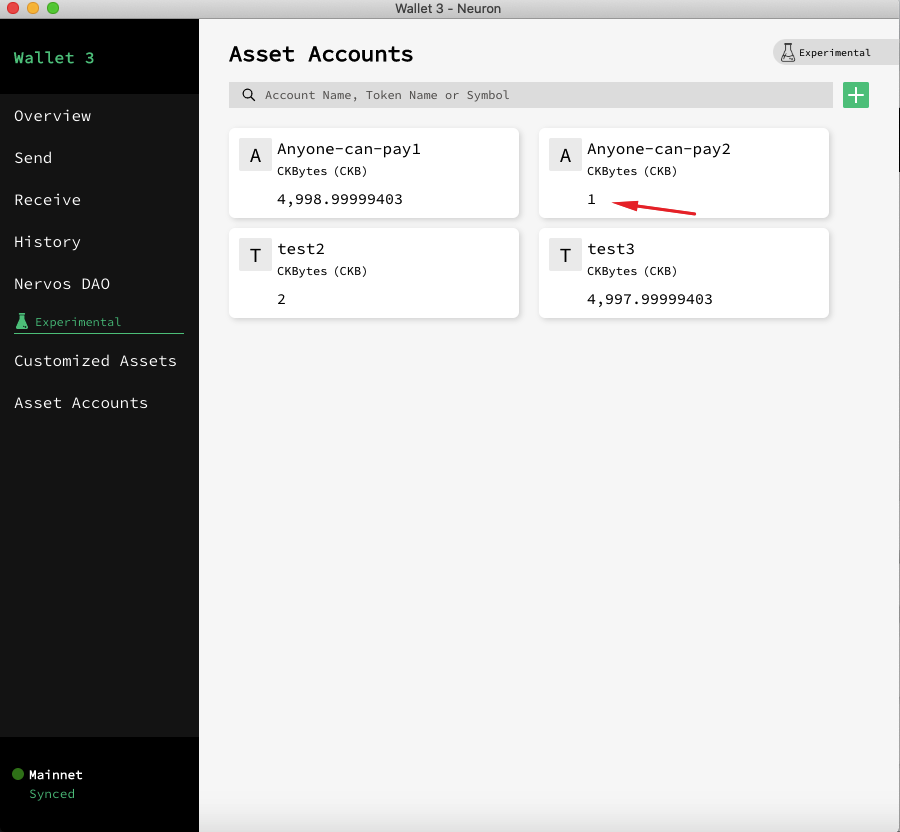
Sync Failure Troubleshooting
There are several causes that lead to Neuron Wallet sync errors. Here is a step-by-step troubleshooting guide to help you resolve the issue.
General Troubleshooting Process
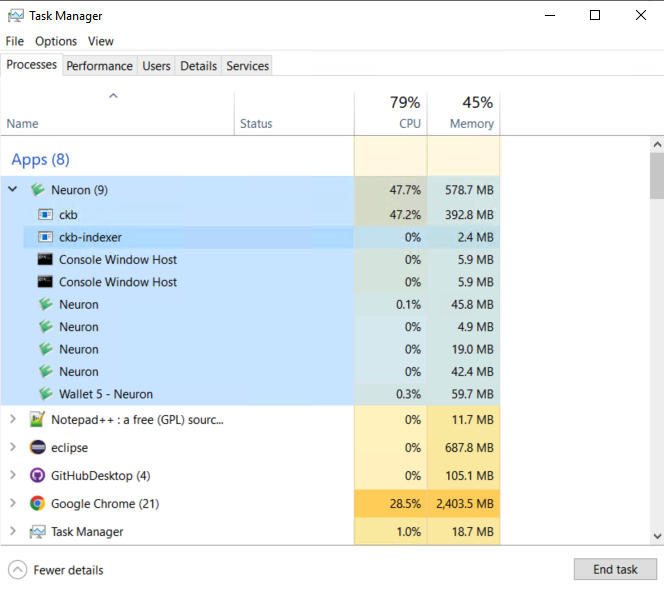
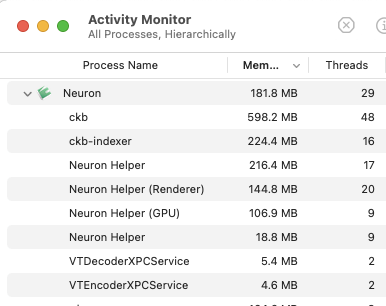
First, check if ckb and ckb-indexer are running.
Windows: Open Task Manager
MacOS: Open Activity Monitor
If ckb and ckb-indexer are both down, to restart, add a network in setting -> network -> add network with rpc url: [http://localhost:8114](http://localhost:8114) and name: mainnet. Switch to the mainnet. Neuron will reconnect to the running CKB node.
If the above doesn't work, we need more information to locate the problem. Get the info by menu -> help -> export debug info and export the files below:
bundled-ckb.log        # ckb log file
hd_public_key_info.csv # generated address index with its transaction count
main.log               # log of Neuron's main process
renderer.log           # log of Neuron's renderer process
status.json            # general info including neuron's version, ckb's version.
Open bundled-ckb.log and scroll down to the bottom. The error (if exists) is usually displayed there. Listed below are four potential cases:
- If you see text like
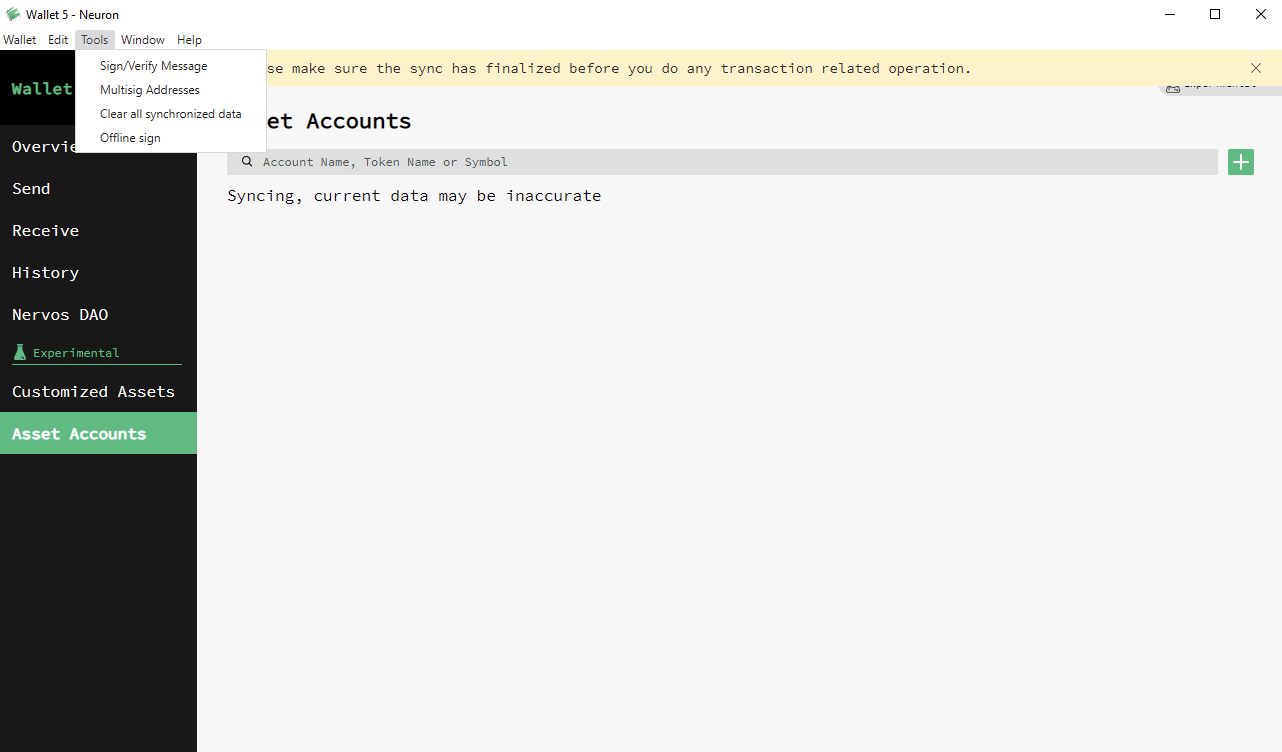
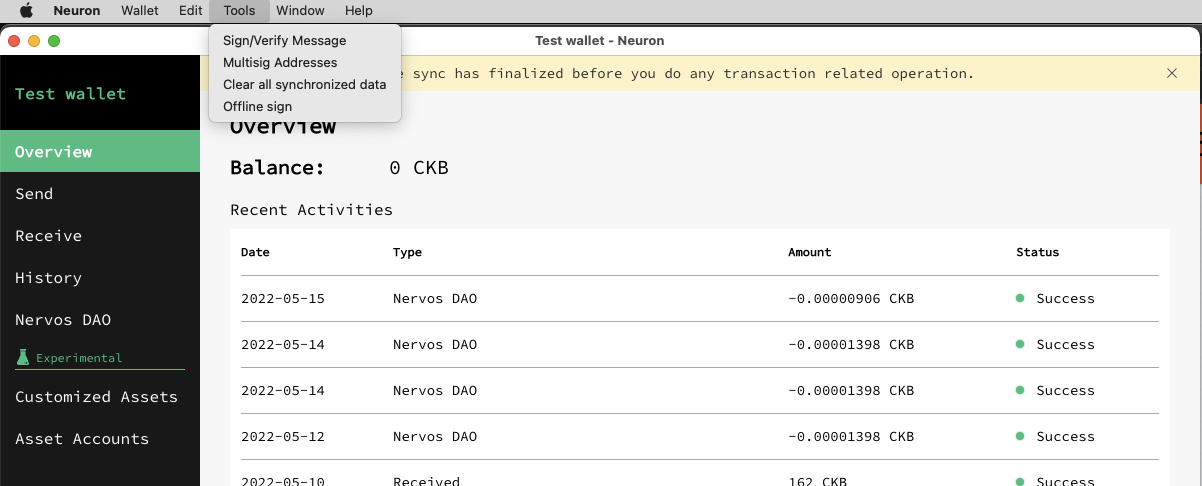
Neuron\chains\mainnet\data\db\LOCKorNeuron/chains/mainnet/data/db/LOCKIt's a problem with the database lock. Remove the.../LOCKfile.- Remove the entire directory by selecting
tools -> clear all synchronized data, but it leads to a new sync from scratch.
- Remove the entire directory by selecting
Windows:
MacOS:
If you see text like
main INFO main ckb version:, check if the version is up to date; If not, remove chain data and restart the synchronization bytools -> clear all synchronized dataIf you see text like
thread 'main' panicked at 'Internal(DataCorrupted(failed to load the options file: IO error: No such file or directoryorEINVAL: invalid argument, follow this issue to check if your username of PC has non-UTF8 characters.If you see text like
error while loading shared libraries: libssl.so.1.1: cannot open shared object file, follow this issue to check if it's caused by the incompatibility of OpenSSL.
Non UTF-8 Characters In Username
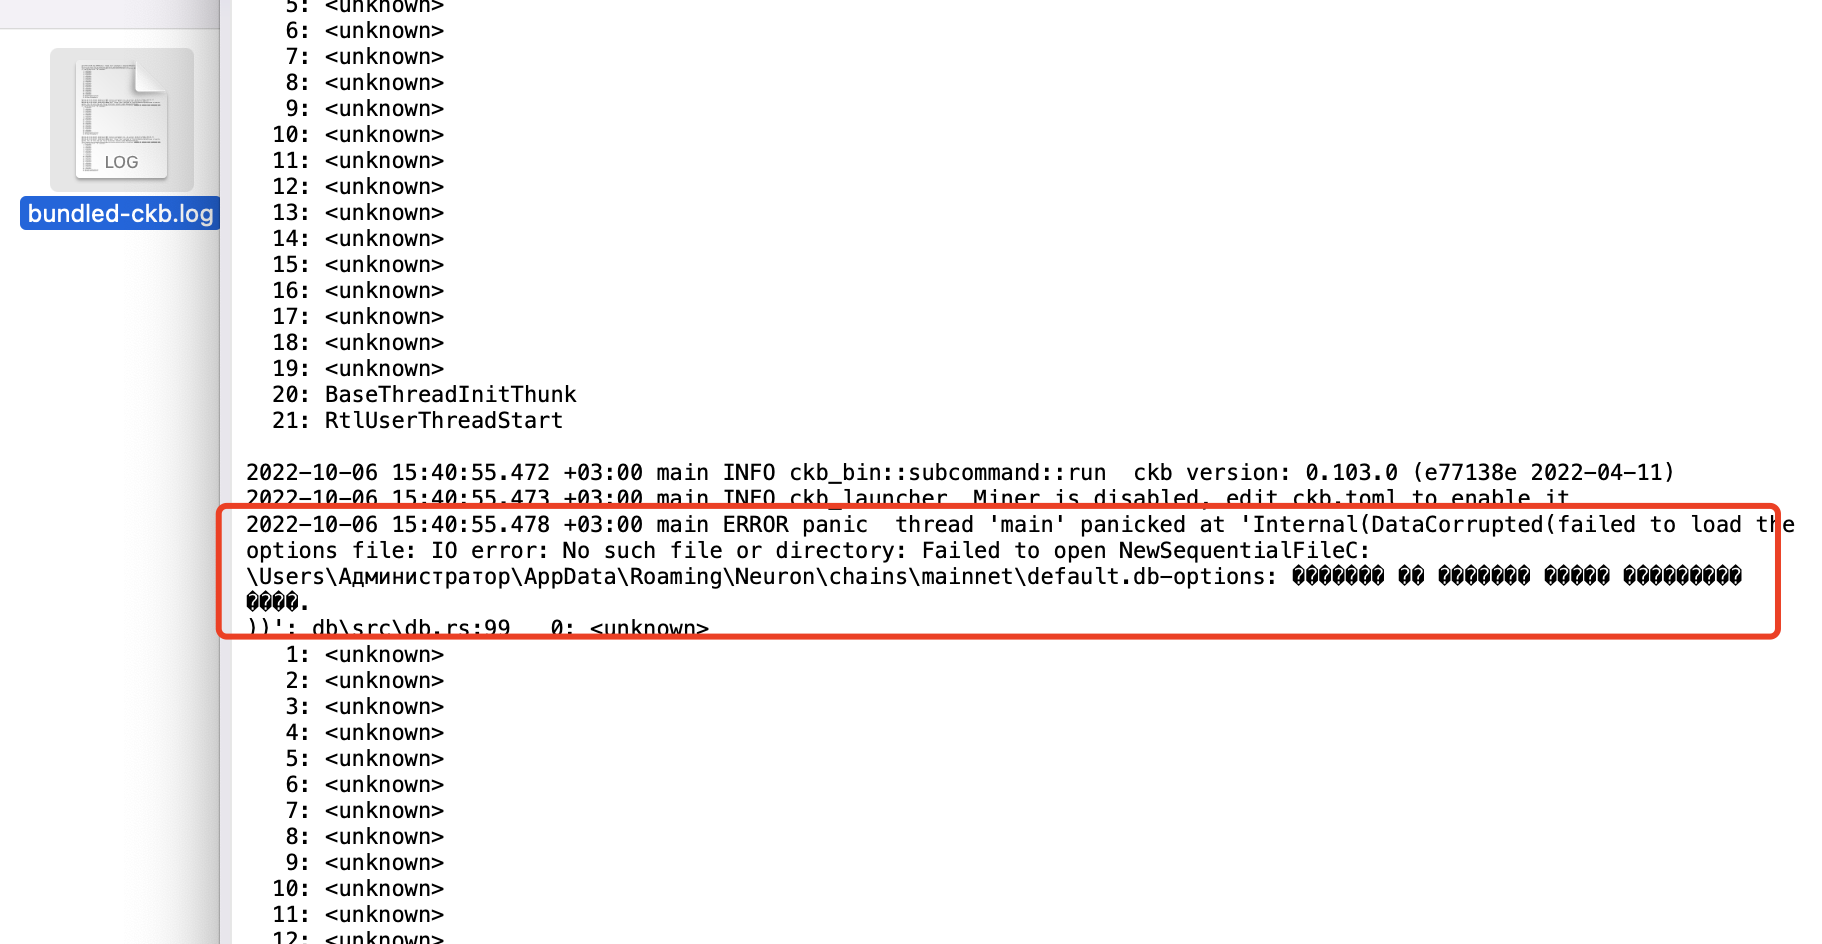
If an exception like this occurs, make sure that your username in file path \Users\{username}\AppData\Roaming\Neuron\... is inside the UTF-8 charset. usename outside of UTF-8 is not allowed, which leads to the failure of running ckb node in Neuron Wallet.
Please follow these steps to check if it's caused by the non-UTF8 issue.
Once confirmed, the simplest way to run Neuron is to create a new account with UTF-8 characters.
Report Your Issue
If you’ve followed the above troubleshooting guide but still cannot locate the problem, export the log and use this template to submit the issue.